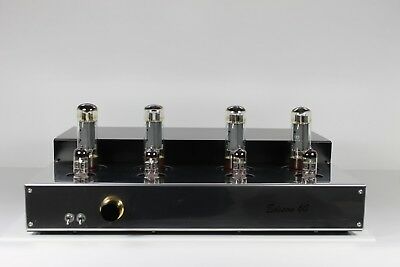
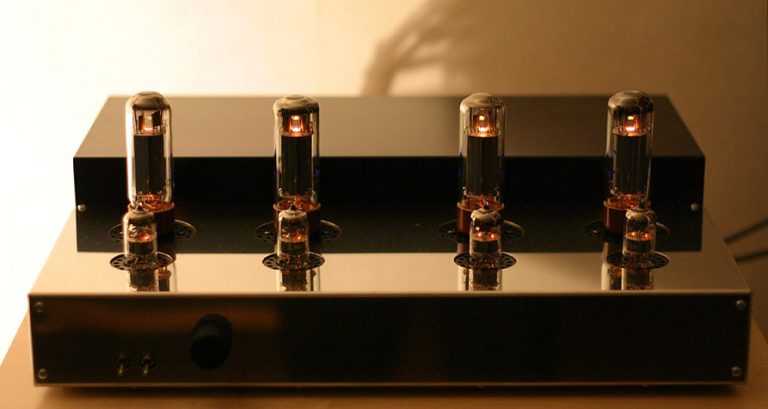
Audion Edison 60 Standard Power Amplifier kit
Audion Edison 60 Standard EL34 PSE, Triode, PP power amplifier kit that you build yourself.
"Well, the Instructions are clear and concise and everything went together fairly simplyy"
Thorsten-Loesch from TNT-audio Tweet


Audion Edison 60 Standard EL34 Power Amplifier kit
Unlocking the World of Valve Amplification with Edison Kits
The Edison kits serve as an exceptional entry point into the captivating realm of valve amplification. Since their launch, the Edison 60 kit has garnered a global following, captivating everyone who have embraced it.
As a core product, the Edison 60 standard boasts versatility, making it suitable for various roles within a comprehensive system. Its robust power output caters not only to hi-fi enthusiasts but also seamlessly integrates into home entertainment system and setups.
Here are the key features of the Edison 60:
Configurability:
- The amplifier can be configured in either Push-Pull or Single-Ended mode.
- With ample power, it satisfies even the most discerning purists, especially when paired with speakers boasting 88dB efficiency or higher.
Affordability and Upgradability:
- The entry-level model is competitively priced, making it accessible to all.
- While technically complete, it offers room for enhancement through additional components (such as the Edison 60 Plus kit).
- Remarkably, it outperforms retail products that cost significantly more.
Comprehensive Kit:
- The kit includes everything needed for assembly, down to the last nut (excluding the power supply cord due to legal reasons).
- Users receive the latest user manual, circuit diagram, and online technical email support.
Self-Assembly and Factory Options:
- Assembling the kit provides a satisfying experience for those who enjoy hands-on work.
- For those less inclined to dive straight in, partial builds are available. For instance, circuit boards can be pre-built and tested.
In summary, the Edison kits combine affordability, performance, and flexibility, making them an excellent choice for both beginners and seasoned audiophiles. Whether you relish self-assembly or prefer a factory-built option, the Edison 60 promises an enriching journey into the world of valve amplification
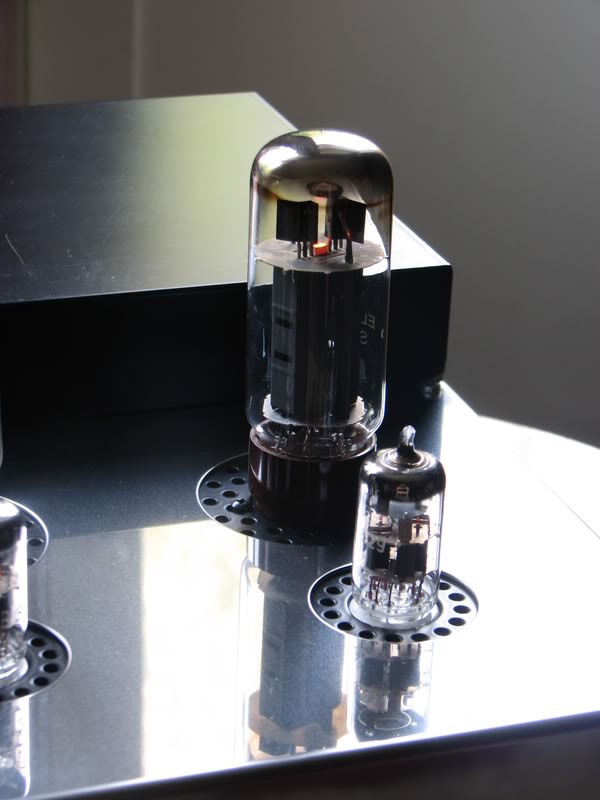
Audion Edison 60 Plus EL34 Kit integrated power amplifier.
Few experiences in life match the sense of achievement and accomplishment that comes from building your own high-end hi-fi audio amplifier. Picture this: you proudly showcase your newly assembled Edison 60 to family and friends, who marvel at its superb sound quality, all while you confidently declare that you built it yourself.
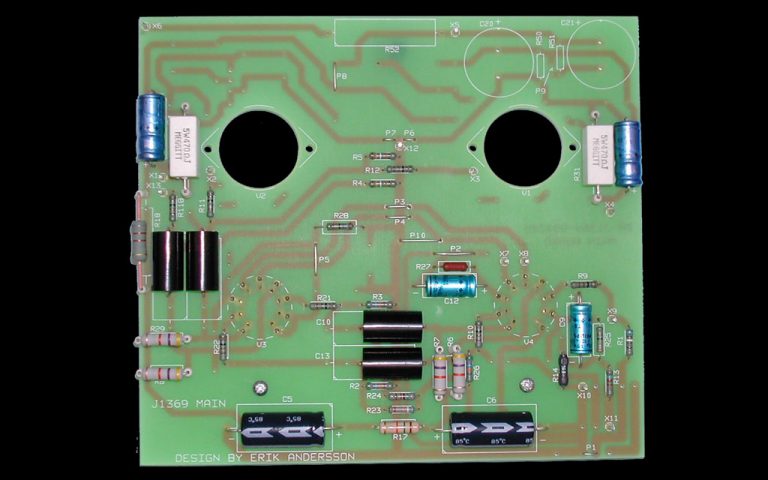
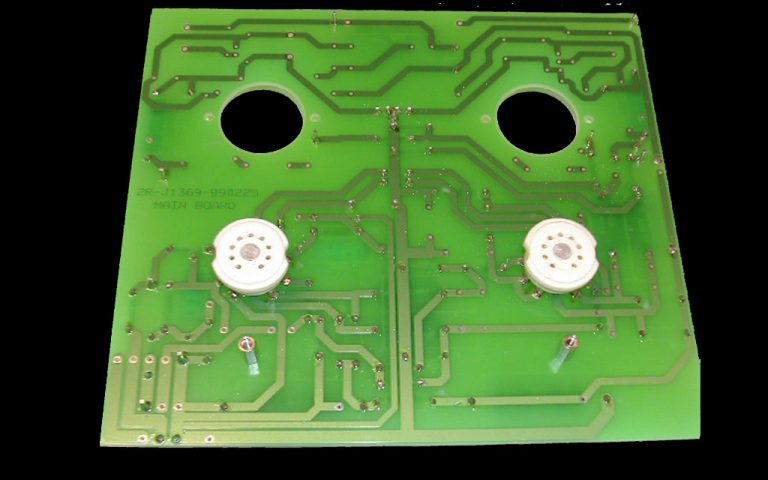
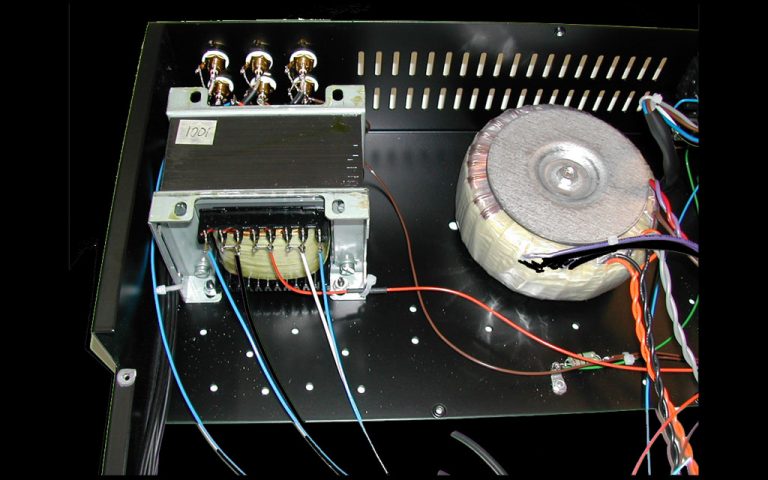
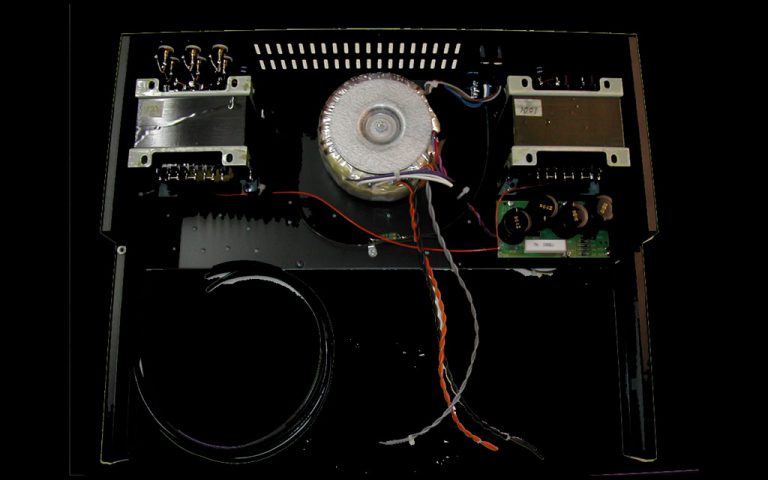
The Edison 60 is a remarkable product that combines two essential components of a high-end audio amplifier: a quality power supply and a valve amplifier circuit. While it’s not a beginner’s project, individuals with solid basic electronics knowledge, proficiency with a multimeter, and the ability to read circuit diagrams (along with following written instructions) will find the kit straightforward to assemble. The standard kit comprises three circuit boards, while the plus kit includes four. The remaining steps involve fitting hardware, wiring connections, and assembling the full chassis.
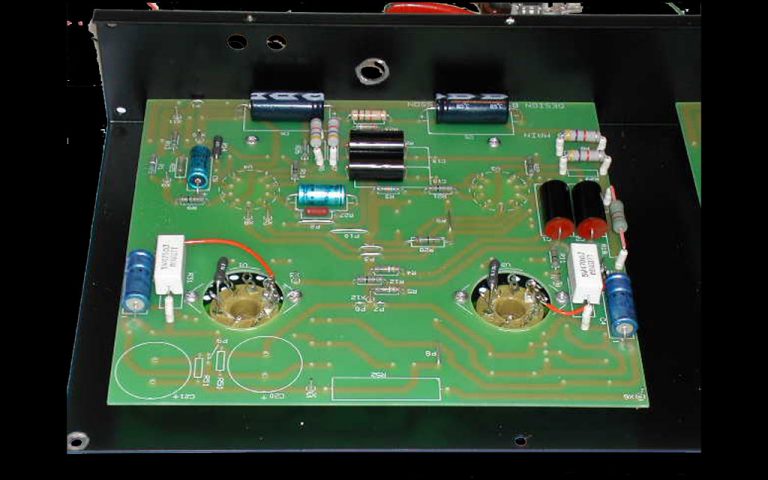
Assembling the circuit boards is straightforward, thanks to clearly marked component numbers on the PCBs. Before assembling the boards, you’ll need to decide on the layout configuration. The Edison 60 can be configured in three modes: Push-Pull, Parallel Single Ended (PSE), or Triode. Each mode offers distinct sound quality and finesse. Opt for push-pull mode if you prioritize power, choose PSE for a balance between power and performance, or go for Triode mode if you seek pure signal quality (with lower power output).
Testing the amplifier can be done using a simple multimeter, and if available, an oscilloscope. Additionally, we’ll provide test tones for download in our dedicated section, eliminating the need for an external signal generator.
The initial listening experience with the Edison 60 surprises most customers—they can’t believe how good it sounds right from the first switch-on. After approximately 100 hours of burn-in time, the amplifier truly blossoms, revealing its full potential
The standard kit contains the following (standard kit).
Featuring a front volume control and three sets of stereo inputs on the rear panel, the Edison 60 eliminates the need for a separate pre-amplifier. Regardless of the circuit mode you choose, the unit is fully auto-biased. Our kit includes JJ EL34 valves, along with new old stock input and driver valves. We take pride in supplying high-quality components from reputable manufacturers, including our own premium output transformers—similarly constructed to those used in our Sterling range of power amplifiers.
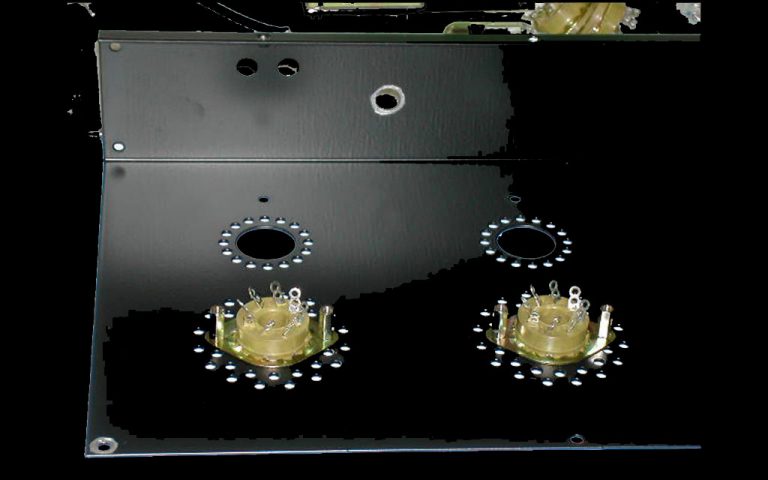
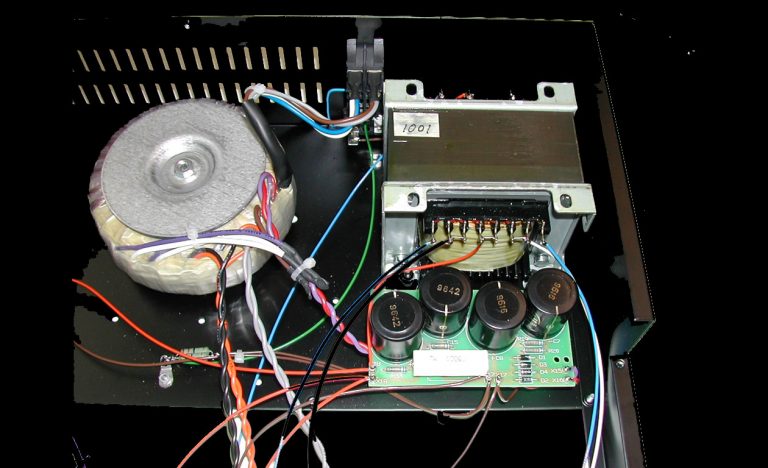
The Edison 60 boasts a top-notch toroidal mains transformer, meticulously specified to meet rigorous standards. This transformer serves both the standard kit and the 300B modification (as noted in another section). Key power supply areas feature fire-resistant resistors, and the printed circuit boards are crafted from high-quality substrates. We prioritize quality by avoiding Chinese-made parts whenever possible. Even the supplied connecting wires are tinned copper of 0.9mm thickness. Additionally, we provide high-quality ceramic valve bases, consistent with those used in our regular power amplifiers.
For those seeking upgrades, we offer several options for enhancing the Edison 60 kit. If there’s an unlisted option you’re interested in, feel free to inquire—we’re here to assist.
The current Edison kit represents our 5th generation product, having been sold since 1991
Technical specifications for the Edison 60 Standard power amplifier kit.
Specifications in Single Ended Mode
2×18 Watts pure Class-A into 8Ω @ 1khz at 240V AC
Load: 4 – 8 Ohm Nominal
Frequency Response: <10 to >40KHz ±1 db
Specifications in Push Pull mode
2×30 Watts at 240V ac pure Class-A” into 8Ω @ 1khz
Load: 4 – 8 Ohm Nominal
1 watt @ 1khz <0.035% in Push-Pull Mode
Frequency Response: <10 to >40KHz ±1 db
Specifications in either mode.
Sensitivity: Variable >250mV Full output in Push Pull Mode
Signal to noise ratio : >98dB (Push-Pull
Output transformer : Multitap with special winding technique to obtain full bass response even in Single-Ended mode.
Consumption: 210 Watts at 240V ac.
Tubes: 4 x EL34, 4 x 6H1N
Size: 45cm deep,36cm wide and 11.5cm tall – Less tubes
Weight: 16kgs
Mains supply: 220-240V AC or 110-120V AC
Fuses – Power 3.5A 240V slow blow.
All of the options and upgrades we offer for the Edison 60 whether it be the standard or the dual mono plus kit have been carefully chosen to improve performance, sound quality and in a couple of cases aesthetics.
Many people ask us about the difference between the standard Edison 60 and the Edison 60 plus kit.
The standard kit contains the following (standard kit). The Edison 60 Plus kit contains the following as extra to the above:
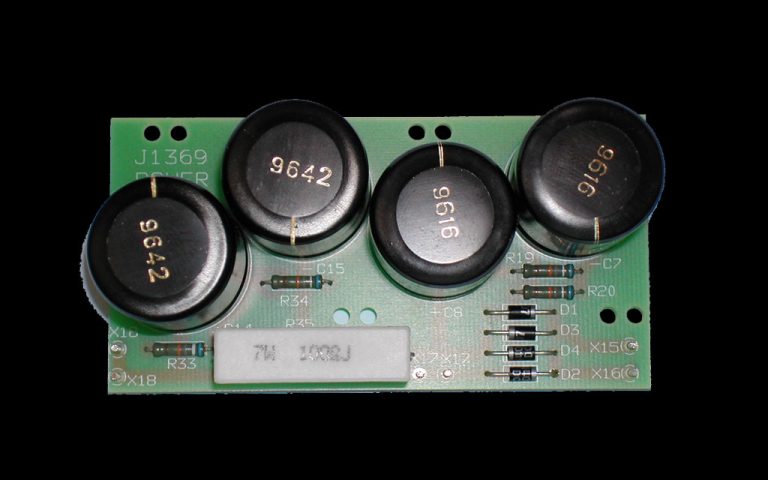
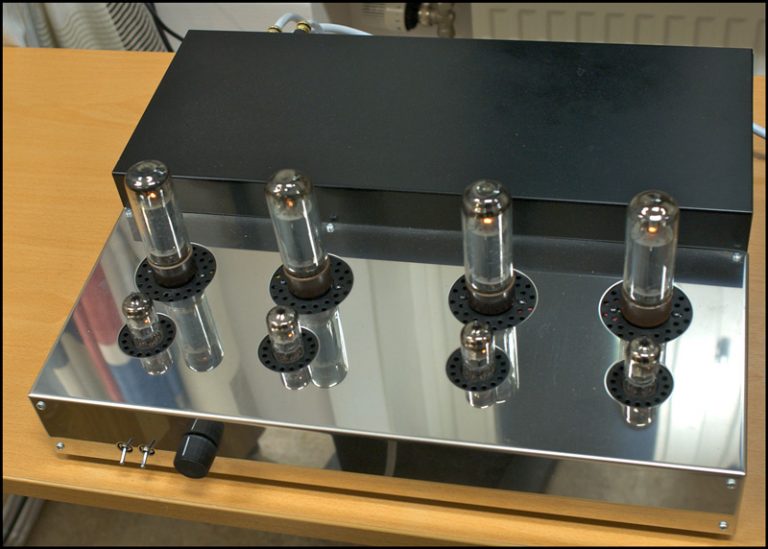
1 x Power supply pack (detailed in standard kit above), Stainless-steel mirror-finished top cover (as seen in the photos). 1 x Toroidal type mains transformer with mounting kit & 1 x Solid Aluminium volume knob. These extras offer extremely good value for money.
Below is a list of our upgrade parts. All of which can be added to your shopping cart when ordering your Edison kit.
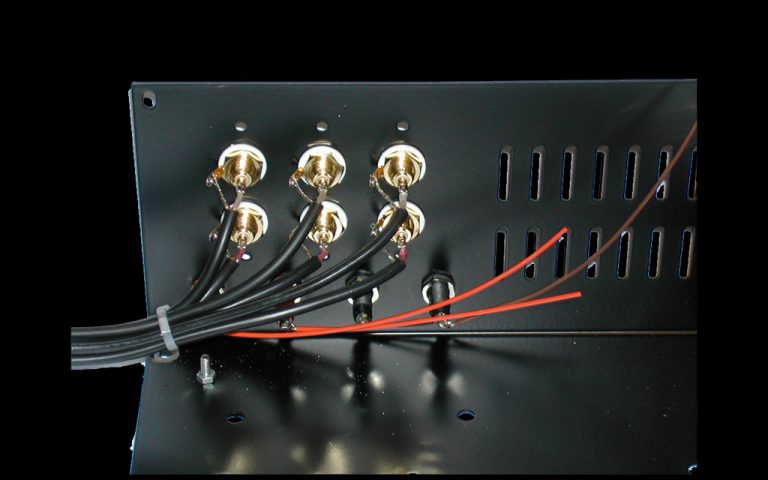
Audion heavy gold or silver plated loudspeaker terminals
Red or BlackAudion gold plated or heavy silver plated RCA sockets Red or Black
Audion Large anti vibration feet and fixings
Alps Blue Velvet potentiometer
Audion Film/foil signal capacitors ERO/Arcol or even better quality.
Tantalum resistors for the signal paths.
Audion Silver Night output transformers.. Better Quality! Only sold when purchasing a complete kit
Audion solid silver interconnect cable. Solid silver 0.6mm or 1mm equippment wire with Teflon PTFE tubing.
Audion Hex head stainless steel button headed screws.
Upgrades on valves, both for EL34 and 6H1N equivalents, will be viewable on the components/Valve page later.
Some words on how to build the Edison 60 Power amplifier kit
We strongly recommend reading the build manual which tells you all you should need to know about building your Edison 60 kit, whether that be in Push Pull, Parallel Single Ended or even Triode mode. Download the manual here, only available in PDF format.
Having read the manual, you probably are itching to start building. But at this point we advise caution, check that you have everything, make sure that your soldering skills are good. Here we would suggest a few practice joints. A good quality temperature controlled soldering iron should be used. along with a good quality solder. If you are using one of the new lead free solders make sure that your iron is capable of working with this. Make sure also that you have ventilation in your room, a nice bright work lamp above your work area and that work area is clean. Don’t forget to use the blue PTFE tubes to mount the higher power resistors off the board a little.
In our factory we work on rubber mats with soft cushioning on top to avoid scratching the powder coating on the chassis. Work systematically and logically. Try to be as neat as possible as this will show and “sound” later in your in construction. If working on circuit boards make sure your joints are firm and secure. I normally tell my builders here at the factory “mechanical first – electrical second” in other words make sure you have a good mechanical joint as well as a good soldered joint.
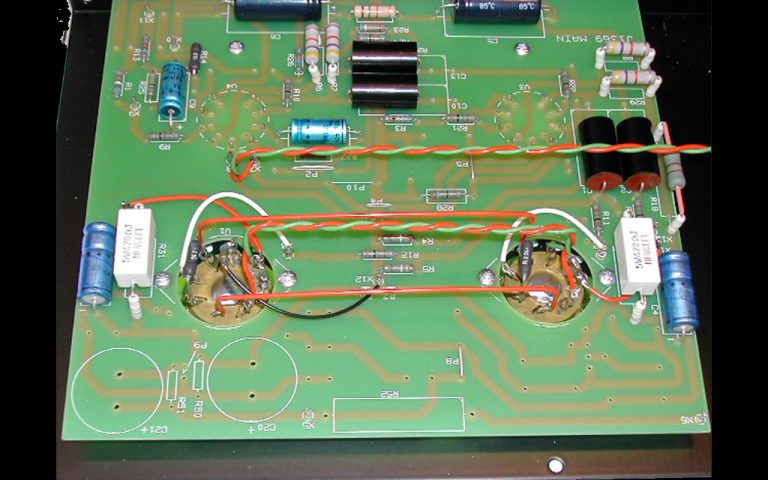
Once your boards are made its time to fit them to the chassis and connect to the rest of the amp.. Be mindful of cable routings.. Make sure that any ac wire is twisted, this helps reduce noise. Make sure also that heater wires and signal wires are away from each other. We have found that signal wires “sound” better if given shallow bends instead of 90 degree bends. (Apart from weakening the wire, the sound quality is diminished). Keep heater wires low to chassis to minimize hum.
Before any testing begins. Stop!!!. leave it for 24 hours and look at what you have done carefully. Many mistakes are found too late. This 24 break allows you to look at your finished project with fresh eyes and spot any mistakes before switch on. If at this stage you are certain everything looks ok, then go to the testing phase.
I know that most home builders will not have access to an oscilloscope or variac or sophisticated test equipment, but a few basic safety principles should apply. When switching on an unknown piece of equipment connect your multimeter probes to the amplifier BEFORE turning on the power, and then simply stand a safe distance away, and flip the switch. No fingers (or any other body part) near the electricity. When you have to make adjustments, then one hand, on an insulated screwdriver or insulated meter probe goes near the amplifier. The other hand (and the rest of your body) does not touch ANYTHING. This procedure makes electric shock very unlikely. It is always a good idea to have a meter on the B+ supply when powering up a new circuit. It gives a quick indication of circuit health, and an indication of how much stored charge is left after the amp is turned off.
Hopefully at this stage the amp is working fine and all that remains is a few basic checks and letting the amp burn in and settle down. It is a good idea to check the current flowing, this gives a very good idea if there are problems.
Thorsten-Loesch from TNT-audio talks about building the Edison 60 kit
Well, the Instructions are clear and concise. Everything went together fairly simple and fairly uneventful.
It took me a lot longer than it should take normally, as I received every option possible under the sun and decided to fit them all.
However, in order to get a handle on how the UK £549 GBP basic kit sounds I had to make sure that I had all options fitted BUT NOT ENABLED….
This required a large quantity of additional PCB pins to be fitted. As a result I am able to very quickly switch between the various configurations. This was done because it is fairly difficult to remove the PCB’s and work on the solder side once fitted.
As a result of this it is also vital TO VERY CAREFULLY CHECK YOU WORK prior to fitting the PCB’s in the chassis. Correcting mistakes later will take much time….
Fitting two mains transformers proved a little challenging at first. After discussing this with Dave Chessell from Audion, he noted that future batches of chassis would come suitably pre-drilled to accommodate either one or two mains transformers, so you should not have the problems….(This has now been done ..ed..)
As noted I was also supplied with the (optional) better RCA sockets and binding-posts. Considering the substantial difficulty of re-fitting these later I built the Kit with the better connection hardware.
I also added a “direct” input bypassing the passive line-stage, as my system is primarily vinyl oriented and hence has got a superb preamp.
The volume control in the kit is made by Alps and the same (sans Motor) as found for example in the well-respected Marantz PM-66 KI Signature Amplifier (£500 GBP). It is however not the last word in transparency. The channel-tracking on these controls is very good BTW if my own experiences are anything to go by.
I also decided to use my favourite wire for wiring the Amp. Again once fitted the wire is hard to upgrade or replace. I think such small changes are within the scope of what any individual constructor may do.
Indeed, I cannot really cite Audion/Edison for packing fairly nondescript wire with the kit. Such a wide variety of options and preferences exist that certainly whatever would be packed with the Kit would be the wrong stuff for someone….
Only one more note on connectors and wires. The loudspeaker connectors supplied in the Basic Kit are perfectly serviceable, but in true British tradition Banana-plug ONLY. You cannot use speaker cables with spades directly.
At only £2.65 GBP each, about $4.00 USD (as per the pricelist on the Edison web site) the optional binding posts will accept any form of connection up to the most monstrous spades. They give little in design, sound and quality to the WBT ones that cost real money…. They are highly recommended for anyone in need of something other than Banana connectors.
For the whole amp, it is probably a good Idea to lay out the major parts in front of you on the empty workbench. Then read the assembly manual (again) and think through in which sequence it would be best to assemble what.
The manual is quite good on that, however it is still only in “Beta” as it has been only recently translated from Swedish into English… (now completely rewritten .. ed)
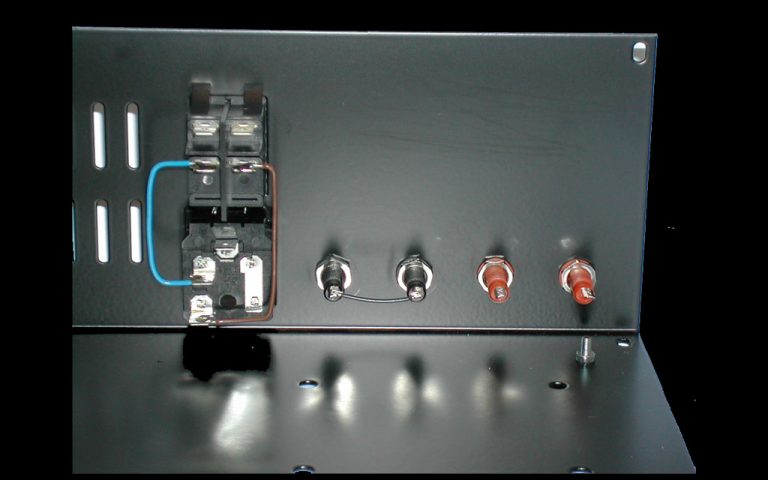
I feel for example that it is advantageous to first wire up all the RCA sockets in the bottom chassis assembly and to then wire the loudspeaker connectors before finally fitting and wiring the output transformers.
Both RCA sockets and speaker connectors are otherwise hidden behind the output transformers and hence fairly difficult to get at. This is not specifically mentioned in the manual.
So applying a little forethought (just as with any large project) will speed up things no end and also make the assembly a much more enjoyable experience.
I am sure subsequent revisions of the manual will address such minor issues.
The assembly of the PCB’s is straightforward and simple. As I had only the downloaded manual published on the web, I do not know if the final printed items includes photographs of the finished boards or (better) an enlarged stuffing guide. I personally at least find such things useful.
Lastly, PLEASE MAKE SURE TO TAKE THE SAFETY NOTES SERIOUS. Also make sure electrolytic capacitors go in the right way.
If you are not particularly experienced in electronics it might be a good Idea to have the boards checked by an experienced friend before fitting them.
If you do it all by yourself, leave the assembled boards for a night and look at them fresh the next day.
In the end, after two day’s work (well not all day long – it’s Summer so I go out as well 😉 ) I was ready to power the unit up. Do not do this without a load attached to the output. Tandy/Radio Shack sells very nice 20W 8-Ohm resistors, which is what I use for such purposes.
Also do NOT switch the amp on without the valves fitted.
All valves lit up. All voltages measured okay (a bit high, but that is the 252V AC delivered to my flat). So, I connected a CD-player and headphone up – and got (almost) no sound!
What had happened was that I had wired the front-end for Push-Pull operation and the output transformer for SE operation. Hence the signals cancelled out in the output transformer and thus no sound…. Given how little leakage was there the AC symmetry of the Edison amp. seems impressive.
I was less impressed with the amount of hum produced by the SE wired output stage (headphones do exaggerate this somewhat), so I rewired the output as Push-Pull. The hum went away totally, proving that it is just a PSU issue in SE mode.
A (optional) set of capacitors for the audio PCB is available and works as far as reducing the hum is concerned.
This is not part of the basic Kit however, so the SE mode of amp. may give you some problems with hum without the additional components fitted. Much will depend on your specific speakers.
After correcting the wiring and closing the chassis I took the amp. into the living room and connected it to the system….
Thorsten-Loesch’s listening experience
Even before I got the amp. connected up, I noted just how pretty an amplifier this is. While the wooden side-cheeks and the stainless-steel top/front plate set you back quite a bit of money (about £70.00 GBP together – $115.00 USD), they make for a look not all that removed from what you would expect on expensive Italian valve esoterica.
Just a little bit less obviously sensuous (the styling ‘Unison Research’ uses is out rightly obscene I would call it naughty – but nice). It is like a slightly reserved British variant of the styling ‘Unison Research’ is so fond of.
I love the styling. So did my friends who where around on Tuesday for a long pre-scheduled listening test on interconnects and mains cables.
If you always have a problem sneaking these black boxes past your spouse or girlfriend, she will love this amp. for its looks, with the optional bits fitted. She will probably allow you to leave the amp. out in the open (best high up on the rack as no valve cage is provided). Which is just as well, as this amp is pure Class-A, it runs hot. Real hot. So you do want to keep the amp. out in the open, well “aired”.
Having checked the mains-transformer temperature; I do note that (like Gustaf mentioned) that the transformer is VERY hot. Not hotter than some other transformers I know about. Not hotter than at least the one of another inexpensive valve amp. kit I know of. (Much improved New Transformer supplied now!)
Nevertheless a little hotter than I like. However speaking strictly as engineer it is perfectly safe and not as hot as to endanger the lifespan of the electrolytic capacitors. Specifying a more powerful (and cooler running) part would have probably driven up the price quite a bit. So unless your listening room has regularly temperatures in excess of 30 Degrees Celsius the Edison 60 with one mains transformer only is just fine if hot…(Much improved New Transformer supplied now!).
But we were on about listening. And sound.
I dropped the Edison 60 straight in at the deep end.
Not broken in it replaced my (tweaked to the hilt and then some) rather good Marantz power amp. This amp. is quite amazing, transparent, without harshness and tremendous bass control. It’s only fault is that it is a very “literal” amplifier….
It recounts the recording, but a bit soul-less. Still it manages to impress the heck out of a lot audio-buddies, specifically the 2A3 and 300B crowd….
In addition my speakers are any small valve amplifiers worst nightmare. Very similar to the Wilson Audio Watt/Puppy combination they are usefully efficient, but need an amp. that can control the woofers….
Why am I explaining all of this? Because I think my criticism of the basic Kit’s sound should be seen in context. I have taken a nice small and inexpensive valve-amplifier kit and dropped it into a “serious High-End System”. This is not the most likely company for the Edison in its basic guise.
Now for the “meat”. Immediately after cueing up some music it became clear to me that my system had just obtained a very notable improvement throughout the mid-range and in it’s spatial presentation….
Everything was more natural, free flowing. Well pretty much what one does expect from good valve amp.
The three dimensionality given to the music was specifically startling. I have always thought of my own system as being rather good on sound staging and imaging, with (within the constraints of the living/listening room) very good depth and lateral spread.
Seems I was wrong about that. The way the Edison made the walls of my living room disappear was positively amazing. While listening to more music, slowly some small shortfalls presented themselves.
During our listening session on Tuesday this became somewhat more evident. With the aid of my friends we came to similar conclusion about the sound of the Edison 60 connected up as the basic kit.
The Edison 60 is a very entertaining amplifier. It makes listening to music very enjoyable; it does however lack a certain degree of low-frequency control and transparency. This really is hardly surprising and in no way gets in the way of enjoying the music.
However, larger orchestral climaxes showed that there was too much too loose bass while for example cymbals where slightly smeared. At the same time the mid-range is absolutely glorious and hint’s that the Edison 60 has “more than just an arm up its sleeve”.
Considering the price of the kit we all were quite impressed. In the end however, my solid state Marantz amp. went back into the system for the rest of the afternoon and evening. Simply the superior bass control and transparency of it allowed us to more clearly and easily distinguish between the different interconnects and mains cables we tried to rate.
The Edison 60 BTW is a “connoisseur” of mains cables, refusing to give the best it had with either normal cables or Kimber mains cables. Using my own “UBYTE-M” mains cable (very similar to Synergistic Researches AC-Master Coupler) provided a surprisingly large improvement.
I could stop here, simply state that the Edison 60 is indeed a fine amplifier and a good buy for the £459 GBP asking price (that is about $700 USD).
I would probably recommend a nice and not too expensive 2-Way speaker and moderate CD-player for a very nice stereo system at a fairly sensible price. I would probably suggest something like the Mordaunt Short MS-25 speaker and the Marantz CD-67 MKII CD-player to form a system for a little over £1000 GBP.
I would recommend the gold Fronted Marantz player as this would compliment the (optional) stainless steel top of the amplifier nicely.
Well here you go. I just could leave it there.
But I can’t.
Begin rave.
Slightly dissatisfied with the performance I decided to pull out all stops with the Edison 60. I enabled the second set of PSU and mains transformer, enabled the additional capacitors on the PCB. Not in hum reducing mode but to bolster PSU capacitance and introduced a smattering of 2.2uF 630V Foil & Film bypass capacitors across the coupling capacitors.
I then eliminated the negative-feedback and the cathode bypass capacitors on the input, in order to reduce the now excessive gain. As the output stage was already wired as Push-Pull Triode I left it at that.
I dropped the amp. back into my system and was knocked out. While a tiny hint of overhang persists in the bass, the amp. now has a more solid bass performance on the 8-Ohm output tap than prior to the changes on the 4-Ohm tap.
Pacing and speed took a major step forward. With the negative-feedback eliminated the treble opened up and has become way more natural. The decay on cymbals is unbelievable. Where before sound staging was wide and deep but slightly fuzzy, now it is acoustic holography.
Without any reservation, this fully loaded Triode Push-Pull version of the Edison 60 is the best Amp I have had in my system so far. And I had quite a few. It is highly recommended.
Having just looked at the most recent price list I noticed that Graeme Holland (Audion’s CEO) has introduced the Edison Plus special. For a list price of £699 GBP . This includes the stainless steel top/front plate, the second mains transformer and PSU board.
If you can find a few nice small bypass cap’s or the money to buy the foil & film capacitors sold as upgrade, you could be listening to pretty much the same amplifier I do now for that. And believe me, you will be amazed.
End of Rave.
I will play around with the SE mode soon, but at the moment, I just want to listen to some more music, let the components break in further and quite frankly enjoy the music.
Peace – Thorsten Loesch
Nothing in life gives you a greater sense of achievement and accomplishment as when you build your own high end hifi audio amplifier and saying to your family and friends as they admire your new Edison 60 and hear its superb sound quality that you built it yourself.
A high end audio amplifier has two basic components: a quality power supply and a valve amplifier circuit the Edison 60 is such a product that has both in copious qualities. Although certainly not a beginner build, to someone who has good basic electronics knowledge, can use a multimeter and possibly read a circuit diagram (as well as follow our written instructions) the kit is straight forward to build. With just 3 circuit boards for the standard kit or 4 for the plus kit, the rest of the build is about fitting hardware, wiring everything together and assembling the full chassis.
Building the circuit boards is easy as all the component numbers are marked on the pcbs. Several layout configurations are available but need to be decided upon before the circuit board assembly takes place. The kit can be configured in Push Pull, parallel single ended or even triode mode. Each mode has a very distinctive sound quality and level of finesse. For power choose push-pull, for a good balance between power and performance then PSE and for pure signal quality (and least power of course) choose Triode mode.
Testing can be done with a simple multimeter and if available an oscilloscope. We will add some test tones for you to download in our downloads section so you don’t even need a signal generator.
First listening to the Edison 60 surprises pretty much all of our customers, they cannot believe how good it sounds from first switch on, and after 100 hours or so when it burns in it really starts to bloom
Having a volume control on the front and 3 sets of stereo inputs on the rear means that a pre-amplifier is not necessary with this unit. The circuit, whechever one you choose is completely auto biased. We supply Electro Harmonix EL34 valves along with new old stock input and driver valves. We supply high quality parts with the kit, from known manufacturers. We supply our own extremely high quality output transformers. Very silmilar in construction to those used in our Sterling range of power amplifiers. A quality toroidal mains transformer which is very well specified and can be used for this kit and also the modification to 300B, noted on another tab. Polypropylene signal capacitors, fire resistant resistors in key power supply areas. The printed circuit boards are made of a high quality substrate and where possible we avoid supplying any chinese made parts. Even the supplied connecting wires are a quality tinned copper of 0.9mm. We supply high quality ceramic valve bases as used in our normal power amplifiers.
We offer many upgrades for the Edison 60 kit, however if there is an option that you would like that is not listed please feel free to ask us for it.
The current Edison kit is now 5th Generation product, originally being sold since 1991.
Technical specifications for the Edison 60 Standard power amplifier kit.
Specifications in Single Ended Mode
2×18 Watts pure Class-A into 8Ω @ 1khz at 240V AC
Load: 4 – 8 Ohm Nominal
Frequency Response: <10 to >40KHz ±1 db
Specifications in Push Pull mode
2×30 Watts at 240V ac pure Class-A” into 8Ω @ 1khz
Load: 4 – 8 Ohm Nominal
1 watt @ 1khz <0.035% in Push-Pull Mode
Frequency Response: <10 to >40KHz ±1 db
Specifications in either mode.
Sensitivity: Variable >250mV Full output in Push Pull Mode
Signal to noise ratio : >98dB (Push-Pull
Output transformer : Multitap with special winding technique to obtain full bass response even in Single-Ended mode.
Consumption: 210 Watts at 240V ac.
Tubes: 4 x EL34, 4 x 6H1N
Size: 45cm deep,36cm wide and 11.5cm tall – Less tubes
Weight: 16kgs
Mains supply: 220-240V AC or 110-120V AC
Fuses – Power 3.5A 240V slow blow.
All of the options and upgrades we offer for the Edison 60 whether it be the standard or the dual mono plus kit have been carefully chosen to improve performance, sound quality and in a couple of cases aesthetics.
Many people ask us about the difference between the standard Edison 60 and the Edison 60 plus kit.
The standard kit contains the following (standard kit). The Edison 60 Plus kit contains the following as extra to the above:
1 x Power supply pack (detailed in standard kit above), Stainless-steel mirror-finished top cover (as seen in the photos). 1 x Toroidal type mains transformer with mounting kit & 1 x Solid Aluminium volume knob. These extras offer extremely good value for money.
Below is a list of our upgrade parts. All of which can be added to your shopping cart when ordering your Edison kit.
Audion heavy gold or silver plated loudspeaker terminals
Red or BlackAudion gold plated or heavy silver plated RCA sockets Red or Black
Audion Large anti vibration feet and fixings
Alps Blue Velvet potentiometer
Audion Film/foil signal capacitors ERO/Arcol or even better quality.
Tantalum resistors for the signal paths.
Audion Silver Night output transformers.. Better Quality! Only sold when purchasing a complete kit
Audion solid silver interconnect cable. Solid silver 0.6mm or 1mm equippment wire with Teflon PTFE tubing.
Audion Hex head stainless steel button headed screws.
Upgrades on valves, both for EL34 and 6H1N equivalents, will be viewable on the components/Valve page later.
Some words on how to build the Edison 60 Power amplifier kit
We strongly recommend reading the build manual which tells you all you should need to know about building your Edison 60 kit, whether that be in Push Pull, Parallel Single Ended or even Triode mode. Download the manual here, only available in PDF format.
Having read the manual, you probably are itching to start building. But at this point we advise caution, check that you have everything, make sure that your soldering skills are good. Here we would suggest a few practice joints. A good quality temperature controlled soldering iron should be used. along with a good quality solder. If you are using one of the new lead free solders make sure that your iron is capable of working with this. Make sure also that you have ventilation in your room, a nice bright work lamp above your work area and that work area is clean. Don’t forget to use the blue PTFE tubes to mount the higher power resistors off the board a little.
In our factory we work on rubber mats with soft cushioning on top to avoid scratching the powder coating on the chassis. Work systematically and logically. Try to be as neat as possible as this will show and “sound” later in your in construction. If working on circuit boards make sure your joints are firm and secure. I normally tell my builders here at the factory “mechanical first – electrical second” in other words make sure you have a good mechanical joint as well as a good soldered joint.
Once your boards are made its time to fit them to the chassis and connect to the rest of the amp.. Be mindful of cable routings.. Make sure that any ac wire is twisted, this helps reduce noise. Make sure also that heater wires and signal wires are away from each other. We have found that signal wires “sound” better if given shallow bends instead of 90 degree bends. (Apart from weakening the wire, the sound quality is diminished). Keep heater wires low to chassis to minimize hum.
Before any testing begins. Stop!!!. leave it for 24 hours and look at what you have done carefully. Many mistakes are found too late. This 24 break allows you to look at your finished project with fresh eyes and spot any mistakes before switch on. If at this stage you are certain everything looks ok, then go to the testing phase.
I know that most home builders will not have access to an oscilloscope or variac or sophisticated test equipment, but a few basic safety principles should apply. When switching on an unknown piece of equipment connect your multimeter probes to the amplifier BEFORE turning on the power, and then simply stand a safe distance away, and flip the switch. No fingers (or any other body part) near the electricity. When you have to make adjustments, then one hand, on an insulated screwdriver or insulated meter probe goes near the amplifier. The other hand (and the rest of your body) does not touch ANYTHING. This procedure makes electric shock very unlikely. It is always a good idea to have a meter on the B+ supply when powering up a new circuit. It gives a quick indication of circuit health, and an indication of how much stored charge is left after the amp is turned off.
Hopefully at this stage the amp is working fine and all that remains is a few basic checks and letting the amp burn in and settle down. It is a good idea to check the current flowing, this gives a very good idea if there are problems.
Thorsten-Loesch from TNT-audio talks about building the Edison 60 kit
Well, the Instructions are clear and concise. Everything went together fairly simple and fairly uneventful.
It took me a lot longer than it should take normally, as I received every option possible under the sun and decided to fit them all.
However, in order to get a handle on how the UK £549 GBP basic kit sounds I had to make sure that I had all options fitted BUT NOT ENABLED….
This required a large quantity of additional PCB pins to be fitted. As a result I am able to very quickly switch between the various configurations. This was done because it is fairly difficult to remove the PCB’s and work on the solder side once fitted.
As a result of this it is also vital TO VERY CAREFULLY CHECK YOU WORK prior to fitting the PCB’s in the chassis. Correcting mistakes later will take much time….
Fitting two mains transformers proved a little challenging at first. After discussing this with Dave Chessell from Audion, he noted that future batches of chassis would come suitably pre-drilled to accommodate either one or two mains transformers, so you should not have the problems….(This has now been done ..ed..)
As noted I was also supplied with the (optional) better RCA sockets and binding-posts. Considering the substantial difficulty of re-fitting these later I built the Kit with the better connection hardware.
I also added a “direct” input bypassing the passive line-stage, as my system is primarily vinyl oriented and hence has got a superb preamp.
The volume control in the kit is made by Alps and the same (sans Motor) as found for example in the well-respected Marantz PM-66 KI Signature Amplifier (£500 GBP). It is however not the last word in transparency. The channel-tracking on these controls is very good BTW if my own experiences are anything to go by.
I also decided to use my favourite wire for wiring the Amp. Again once fitted the wire is hard to upgrade or replace. I think such small changes are within the scope of what any individual constructor may do.
Indeed, I cannot really cite Audion/Edison for packing fairly nondescript wire with the kit. Such a wide variety of options and preferences exist that certainly whatever would be packed with the Kit would be the wrong stuff for someone….
Only one more note on connectors and wires. The loudspeaker connectors supplied in the Basic Kit are perfectly serviceable, but in true British tradition Banana-plug ONLY. You cannot use speaker cables with spades directly.
At only £2.65 GBP each, about $4.00 USD (as per the pricelist on the Edison web site) the optional binding posts will accept any form of connection up to the most monstrous spades. They give little in design, sound and quality to the WBT ones that cost real money…. They are highly recommended for anyone in need of something other than Banana connectors.
For the whole amp, it is probably a good Idea to lay out the major parts in front of you on the empty workbench. Then read the assembly manual (again) and think through in which sequence it would be best to assemble what.
The manual is quite good on that, however it is still only in “Beta” as it has been only recently translated from Swedish into English… (now completely rewritten .. ed)
I feel for example that it is advantageous to first wire up all the RCA sockets in the bottom chassis assembly and to then wire the loudspeaker connectors before finally fitting and wiring the output transformers.
Both RCA sockets and speaker connectors are otherwise hidden behind the output transformers and hence fairly difficult to get at. This is not specifically mentioned in the manual.
So applying a little forethought (just as with any large project) will speed up things no end and also make the assembly a much more enjoyable experience.
I am sure subsequent revisions of the manual will address such minor issues.
The assembly of the PCB’s is straightforward and simple. As I had only the downloaded manual published on the web, I do not know if the final printed items includes photographs of the finished boards or (better) an enlarged stuffing guide. I personally at least find such things useful.
Lastly, PLEASE MAKE SURE TO TAKE THE SAFETY NOTES SERIOUS. Also make sure electrolytic capacitors go in the right way.
If you are not particularly experienced in electronics it might be a good Idea to have the boards checked by an experienced friend before fitting them.
If you do it all by yourself, leave the assembled boards for a night and look at them fresh the next day.
In the end, after two day’s work (well not all day long – it’s Summer so I go out as well 😉 ) I was ready to power the unit up. Do not do this without a load attached to the output. Tandy/Radio Shack sells very nice 20W 8-Ohm resistors, which is what I use for such purposes.
Also do NOT switch the amp on without the valves fitted.
All valves lit up. All voltages measured okay (a bit high, but that is the 252V AC delivered to my flat). So, I connected a CD-player and headphone up – and got (almost) no sound!
What had happened was that I had wired the front-end for Push-Pull operation and the output transformer for SE operation. Hence the signals cancelled out in the output transformer and thus no sound…. Given how little leakage was there the AC symmetry of the Edison amp. seems impressive.
I was less impressed with the amount of hum produced by the SE wired output stage (headphones do exaggerate this somewhat), so I rewired the output as Push-Pull. The hum went away totally, proving that it is just a PSU issue in SE mode.
A (optional) set of capacitors for the audio PCB is available and works as far as reducing the hum is concerned.
This is not part of the basic Kit however, so the SE mode of amp. may give you some problems with hum without the additional components fitted. Much will depend on your specific speakers.
After correcting the wiring and closing the chassis I took the amp. into the living room and connected it to the system….
Thorsten-Loesch’s listening experience
Even before I got the amp. connected up, I noted just how pretty an amplifier this is. While the wooden side-cheeks and the stainless-steel top/front plate set you back quite a bit of money (about £70.00 GBP together – $115.00 USD), they make for a look not all that removed from what you would expect on expensive Italian valve esoterica.
Just a little bit less obviously sensuous (the styling ‘Unison Research’ uses is out rightly obscene I would call it naughty – but nice). It is like a slightly reserved British variant of the styling ‘Unison Research’ is so fond of.
I love the styling. So did my friends who where around on Tuesday for a long pre-scheduled listening test on interconnects and mains cables.
If you always have a problem sneaking these black boxes past your spouse or girlfriend, she will love this amp. for its looks, with the optional bits fitted. She will probably allow you to leave the amp. out in the open (best high up on the rack as no valve cage is provided). Which is just as well, as this amp is pure Class-A, it runs hot. Real hot. So you do want to keep the amp. out in the open, well “aired”.
Having checked the mains-transformer temperature; I do note that (like Gustaf mentioned) that the transformer is VERY hot. Not hotter than some other transformers I know about. Not hotter than at least the one of another inexpensive valve amp. kit I know of. (Much improved New Transformer supplied now!)
Nevertheless a little hotter than I like. However speaking strictly as engineer it is perfectly safe and not as hot as to endanger the lifespan of the electrolytic capacitors. Specifying a more powerful (and cooler running) part would have probably driven up the price quite a bit. So unless your listening room has regularly temperatures in excess of 30 Degrees Celsius the Edison 60 with one mains transformer only is just fine if hot…(Much improved New Transformer supplied now!).
But we were on about listening. And sound.
I dropped the Edison 60 straight in at the deep end.
Not broken in it replaced my (tweaked to the hilt and then some) rather good Marantz power amp. This amp. is quite amazing, transparent, without harshness and tremendous bass control. It’s only fault is that it is a very “literal” amplifier….
It recounts the recording, but a bit soul-less. Still it manages to impress the heck out of a lot audio-buddies, specifically the 2A3 and 300B crowd….
In addition my speakers are any small valve amplifiers worst nightmare. Very similar to the Wilson Audio Watt/Puppy combination they are usefully efficient, but need an amp. that can control the woofers….
Why am I explaining all of this? Because I think my criticism of the basic Kit’s sound should be seen in context. I have taken a nice small and inexpensive valve-amplifier kit and dropped it into a “serious High-End System”. This is not the most likely company for the Edison in its basic guise.
Now for the “meat”. Immediately after cueing up some music it became clear to me that my system had just obtained a very notable improvement throughout the mid-range and in it’s spatial presentation….
Everything was more natural, free flowing. Well pretty much what one does expect from good valve amp.
The three dimensionality given to the music was specifically startling. I have always thought of my own system as being rather good on sound staging and imaging, with (within the constraints of the living/listening room) very good depth and lateral spread.
Seems I was wrong about that. The way the Edison made the walls of my living room disappear was positively amazing. While listening to more music, slowly some small shortfalls presented themselves.
During our listening session on Tuesday this became somewhat more evident. With the aid of my friends we came to similar conclusion about the sound of the Edison 60 connected up as the basic kit.
The Edison 60 is a very entertaining amplifier. It makes listening to music very enjoyable; it does however lack a certain degree of low-frequency control and transparency. This really is hardly surprising and in no way gets in the way of enjoying the music.
However, larger orchestral climaxes showed that there was too much too loose bass while for example cymbals where slightly smeared. At the same time the mid-range is absolutely glorious and hint’s that the Edison 60 has “more than just an arm up its sleeve”.
Considering the price of the kit we all were quite impressed. In the end however, my solid state Marantz amp. went back into the system for the rest of the afternoon and evening. Simply the superior bass control and transparency of it allowed us to more clearly and easily distinguish between the different interconnects and mains cables we tried to rate.
The Edison 60 BTW is a “connoisseur” of mains cables, refusing to give the best it had with either normal cables or Kimber mains cables. Using my own “UBYTE-M” mains cable (very similar to Synergistic Researches AC-Master Coupler) provided a surprisingly large improvement.
I could stop here, simply state that the Edison 60 is indeed a fine amplifier and a good buy for the £459 GBP asking price (that is about $700 USD).
I would probably recommend a nice and not too expensive 2-Way speaker and moderate CD-player for a very nice stereo system at a fairly sensible price. I would probably suggest something like the Mordaunt Short MS-25 speaker and the Marantz CD-67 MKII CD-player to form a system for a little over £1000 GBP.
I would recommend the gold Fronted Marantz player as this would compliment the (optional) stainless steel top of the amplifier nicely.
Well here you go. I just could leave it there.
But I can’t.
Begin rave.
Slightly dissatisfied with the performance I decided to pull out all stops with the Edison 60. I enabled the second set of PSU and mains transformer, enabled the additional capacitors on the PCB. Not in hum reducing mode but to bolster PSU capacitance and introduced a smattering of 2.2uF 630V Foil & Film bypass capacitors across the coupling capacitors.
I then eliminated the negative-feedback and the cathode bypass capacitors on the input, in order to reduce the now excessive gain. As the output stage was already wired as Push-Pull Triode I left it at that.
I dropped the amp. back into my system and was knocked out. While a tiny hint of overhang persists in the bass, the amp. now has a more solid bass performance on the 8-Ohm output tap than prior to the changes on the 4-Ohm tap.
Pacing and speed took a major step forward. With the negative-feedback eliminated the treble opened up and has become way more natural. The decay on cymbals is unbelievable. Where before sound staging was wide and deep but slightly fuzzy, now it is acoustic holography.
Without any reservation, this fully loaded Triode Push-Pull version of the Edison 60 is the best Amp I have had in my system so far. And I had quite a few. It is highly recommended.
Having just looked at the most recent price list I noticed that Graeme Holland (Audion’s CEO) has introduced the Edison Plus special. For a list price of £699 GBP . This includes the stainless steel top/front plate, the second mains transformer and PSU board.
If you can find a few nice small bypass cap’s or the money to buy the foil & film capacitors sold as upgrade, you could be listening to pretty much the same amplifier I do now for that. And believe me, you will be amazed.
End of Rave.
I will play around with the SE mode soon, but at the moment, I just want to listen to some more music, let the components break in further and quite frankly enjoy the music.
Peace – Thorsten Loesch
Audion Sterling EL34 30th Anniversary stereo amplifier – In German


Like or share our page – click any of the links below..
Add Your kit upgrade parts here to your basket
-
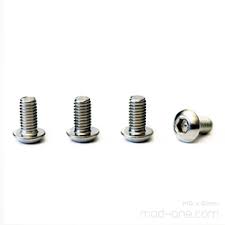
Audion Hex head stainless steel button headed screws.
£5.95 Add to basket -

Audion Blue Silver Solid silver wire
Read more -
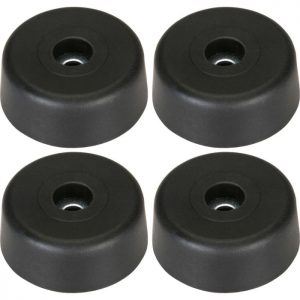
Audion anti vibration feet and fixings
£12.00 Add to basket -
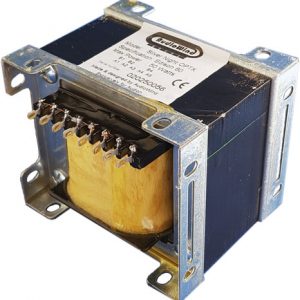
Audion Silver Night output transformers.. Better Quality!
£120.00 Add to basket -
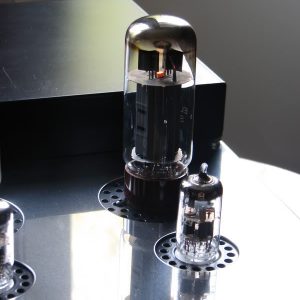
Edison 60 Plus Power Amplifier kit
£799.00 Add to basket -
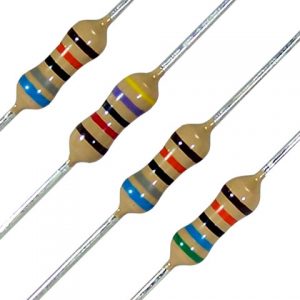
Edison 60 – Tantalum resistors for the signal paths
£82.00 Add to basket -
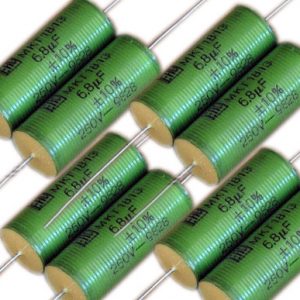
Audion Film/foil signal capacitors ERO/Arcol or even better quality
£86.00 Add to basket -
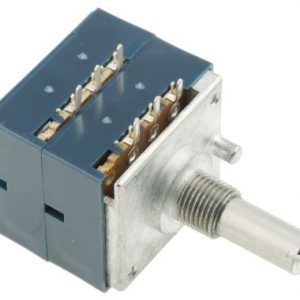
Alps Blue Velvet Potentiometer
£16.20 Add to basket -
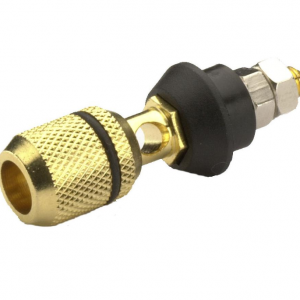
Audion heavy gold plated loudspeaker terminals Red & Black
£36.00 Add to basket -
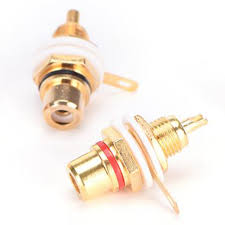
Audion gold plated or heavy silver plated RCA sockets Red or Black
£21.00 Add to basket -

Audion Edison 60 Standard Power Amplifier Kit
£599.00 Add to basket

